2. Installing 7-Zip, PCSX2, and Aemulus#
2.1. Folders#
Note
If you’re running on linux, any instance of “C:\Emulation” can be replaced with “~/Documents/P3FMods” where ~ refers to your home folder.
1. Setup a folder that is outside your user profile. Recommendation is to use something like C:\Emulation or C:\Persona, whichever is more convenient for you.
a. Open up windows file explorer, click “This PC” (In other languages this will be named different, in Japanese it’s just “PC”)
b. Navigate to your “C:\” Drive (or whichever other drive you want to set this up at)
c. Right click an empty space, hover over “New”, then click folder
d. Name the folder Persona, or Emulation, or whatever else will make it easy to identify for you.


2.2. 7-zip#
2. Install 7-Zip, you should have the following files in your downloads folder. Open up a new file explorer window (Ctrl+N in the previous window will work for this) and navigate to “Downloads” using the quick access bar at the left

a. Double click the 7z exe file, the icon will be black and white, and then follow the prompts to install.
2.3. Aemulus#
- .. note::
For installing Aemulus under Linux, you will skip this section and instead follow the directions at Installing Aemulus on Linux.
3. Extract the contents of each of the packages we downloaded earlier. If 7zip is associated as the default file handler for 7z files, you should be able to double click them to open them up. If it is not and the icon shows as a blank white file icon instead, you will need to right click, hover over “7-Zip”, then click “Open archive.”
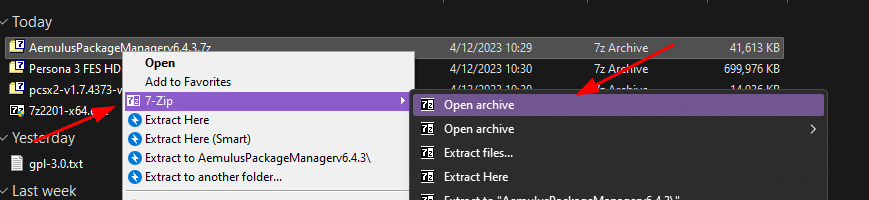
a. Open up the Aemulus 7-zip package, and drag and drop the contents into your C:\Emulation folder.

b. A few popups will come up during the extraction process, followed by a final explorer copy pop up. Let these do their thing, do not interrupt them or hit cancel.
2.4. PCSX2#
Note
For Linux, I recommend using TheAssassin/AppImageLauncher which will allow you to install your AppImages. Beyond that, an appimage is just a self contained binary, move it somewhere you can find it (or integrate it), no further steps required. Skip to step d.

c. Make a folder for PCSX2 in your C:\Emulation folder by right clicking an empty area, hovering over “New”, and clicking “Folder.” Then open up the newly made PCSX2 folder


d. Make another folder called ROM (this is where your Persona 3 FES.iso will go) using the same steps as above.
e. Make one last folder called MOD (this is where your ELF will go along with your Aemulus mod files using the same steps as above.)
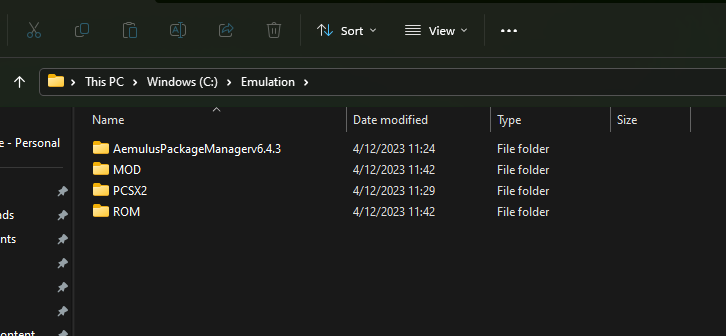
f. Copy over your legally obtained Persona 3 FES.iso into the ROM folder now.
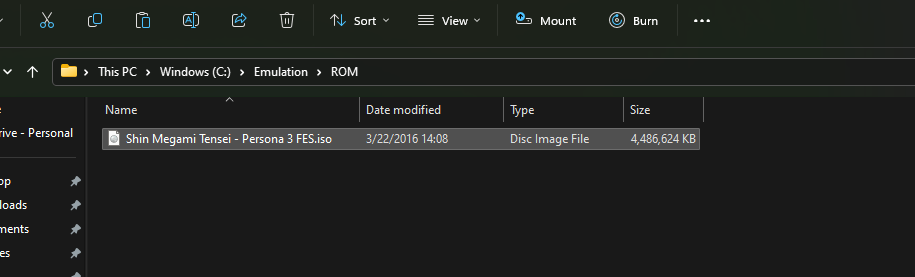
g. Next we’re going to grab the ELF file. Right click your Persona 3 FES iso file, hover over “7-Zip”, click “Open archive.”

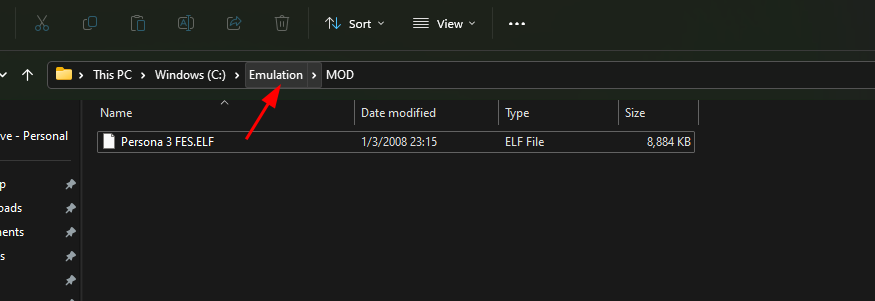
h. Navigate back to your Emulation folder by clicking Emulation in your address bar, then double click MOD to open it.

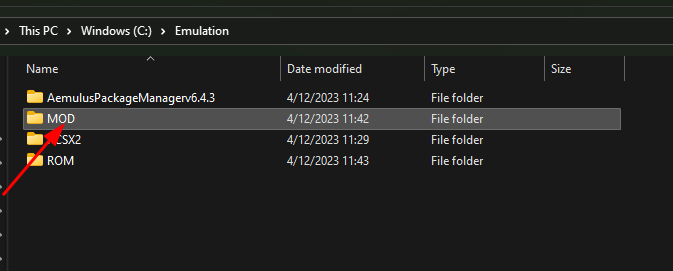
i. In 7-Zip File Manager, select the “SLUS_216.21” file, then drag and drop it into your MOD folder.


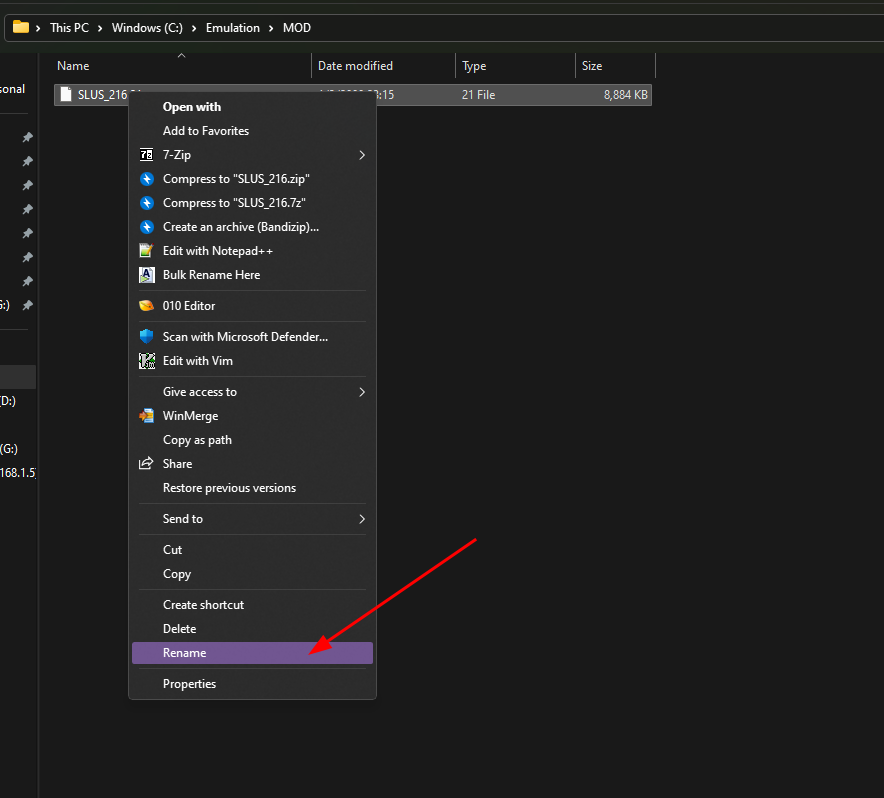
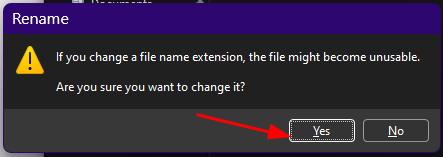
j. Rename your “SLUS_216.21” file to something like Persona 3 FES.ELF or whatever else you want it to be called, as long as it ends in .ELF. Right click the file, then click Rename. Then type the name Persona 3 FES.ELF then hit enter. Finally it’ll give you a prompt asking if you want to change the file extension. Click “Yes.” | “Um, Miss Kitty, CEP says you shouldn’t rename the ELF.” That’s cool, don’t do it if you don’t want to - just tack .ELF to the end of the file, it makes no difference other than making your Discord Rich Presence not look stupid in PCSX2 if you choose to enable that, and also makes the game recognizable in your PCSX2 game list.


k. Navigate back to your C:\Emulation folder by clicking “Emulation” in the address bar at the top.
l. Open up the PCSX2 7z file in your downloads folder in 7-zip, either by double clicking or right click, hover over “7-Zip”, then click “Open Archive.”
m. Select all files in the 7-Zip file manager (Ctrl-A is the easiest way to do this). Then drag the contents into the PCSX2 folder.


n. Open “pcsx2-qt.exe” once to populate all of your files.
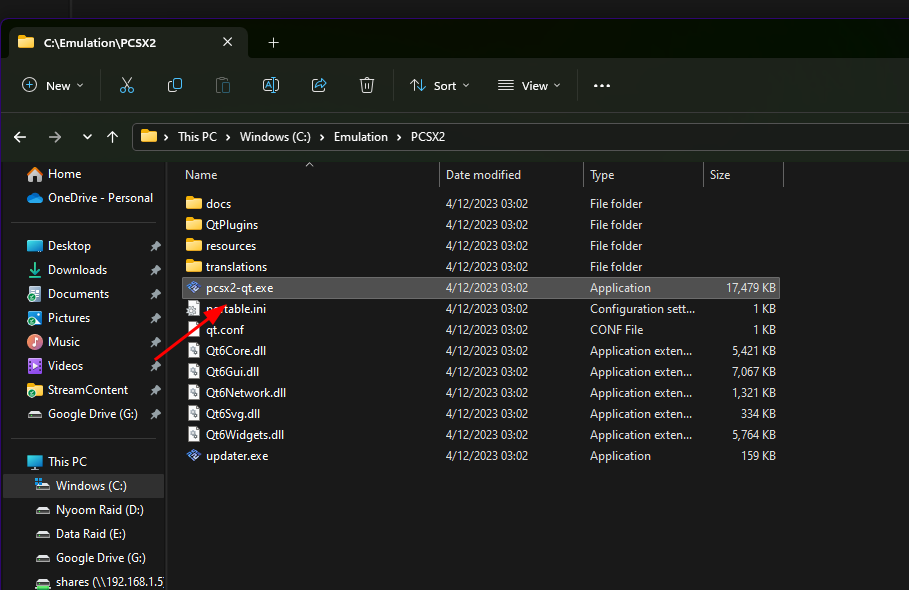

o. Copy over your legally obtained bios into the bios folder. We’ll cover making sure your BIOS is in pcsx2 correctly later. For now, go ahead and close pcsx2.