9. MacOS and Transferring from Different Systems#
The above steps will get you most of the way there, the PCSX2
application steps should translate most of the way, but will look a
little bit different, and they won’t need to be done on your windows
machine/VM
9.1. Information for VMs#
What is a VM? A VM is a virtual machine. This guide will refer to it
as a VM from now on.
If you need a guide for installing windows under KVM (Linux) you can
find that
here.
If you need a guide for installing under VirtualBox in MacOS, you can
find that
here.
If you’re using a VM, you will need to copy them over either via a
shared folder in your chosen virtualization software, or via SMB by
creating a network share to the C:\Emulation folder under windows and
then navigating to smb://vmip/Emulation (Example:
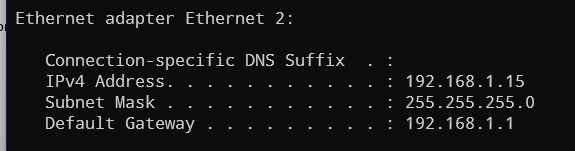
smb://192.168.1.15/Emulation) if you don’t know the IP, you can get it
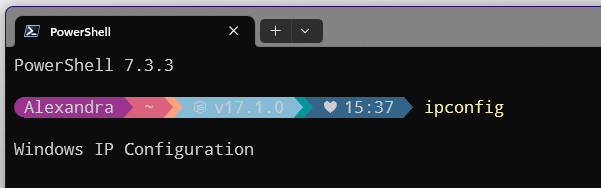
by opening cmd from the start menu, and typing ipconfig. Also
open firewall.cpl and disable the firewall in the VM so you can
access the folder.
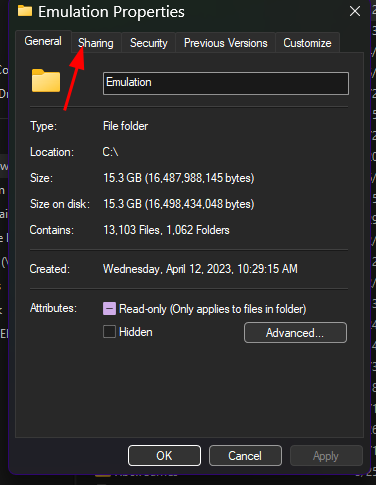
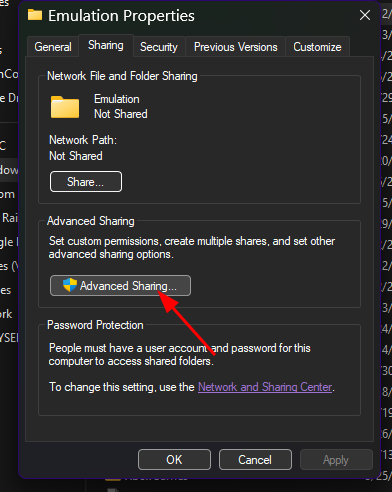
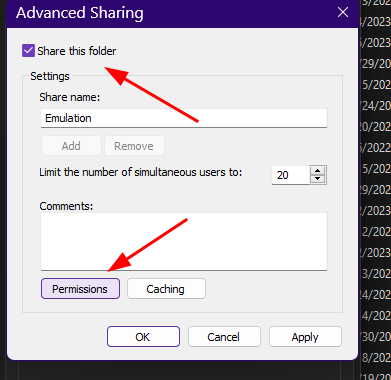
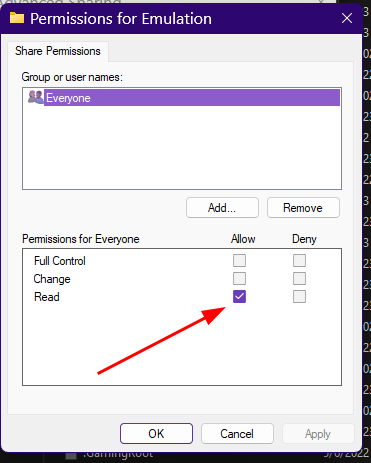
Make sure everyone has at least read access as you’ll be copying the
files from there
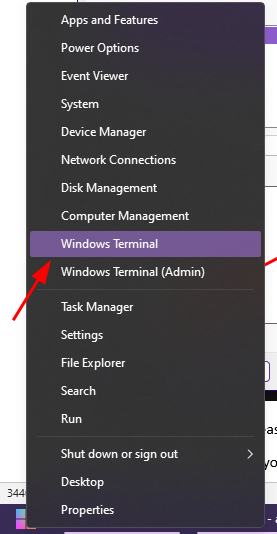
To get the IP, right click start, click “Windows Terminal” or
“Command Prompt”, whichever option you have
Type ipconfig
Then find the IPv4 address of your network adapter.
9.2. Physical Machine#
If you’re using a physical machine to setup the mod instead, all
you need to do is copy the contents of the Emulation folder to a USB
flash drive, or SD card or similar.
9.3. Setting up the files on Linux/Steam Deck/MacOS#
Once your mods are copied, you will then copy the contents of your
MOD folder under C:\Emulation\MOD to your Linux\Mac computer, and
then point PCSX2 to the ELF.
You will also need to copy the textures folder from the PCSX2 folder
on windows, along with all 3 cheats folders to ~/.config/PCSX2 (This
location is applicable to Linux Native and AppImage installs)
On Mac, double check where your textures and cheats paths are in your
emulator and then copy them over as needed.